Guide - Calendar Integration Feature
One of the most prominent requests from users of our platform is to directly book a consultation with professionals and businesses through their profile on ArchiPro.
We've listened, and are now introducing this new functionality, enabling you to sync your work calendar for potential clients to easily book a consultation directly with you.
With a user-friendly booking interface, streamline how you connect with leads and eliminate the hassle of back-and-forth emails by letting the client find a time in your schedule.
Please book a time if you would like further support with this set up.
Beta Testing
Outline
To bring this feature to life, we have partnered with Cal.com who provide calendar integration to booking forms. For the testing phase we have a global account which will feed into individual accounts for our clients.
If successful, phase two will be to build the technology into a bespoke offering for our business membership accounts, with full functionality available inside the ArchiPro business manager.
We will also explore the ability to request payment for the booking, if that is the standard practice for your company’s consultation policy.
Setup Process
Activation
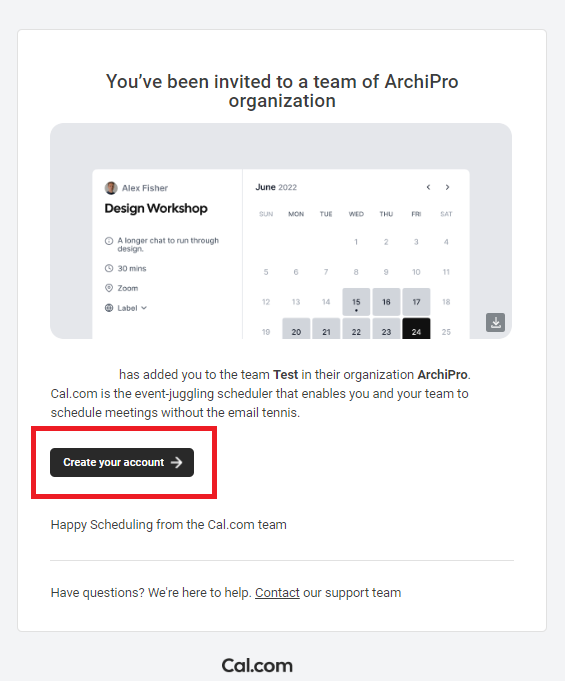
- You will receive an invite via email to create an account.
- Click on the link to start the process.
- Your user name and email will be pre populated.
- Choose a password and click ‘create account’.
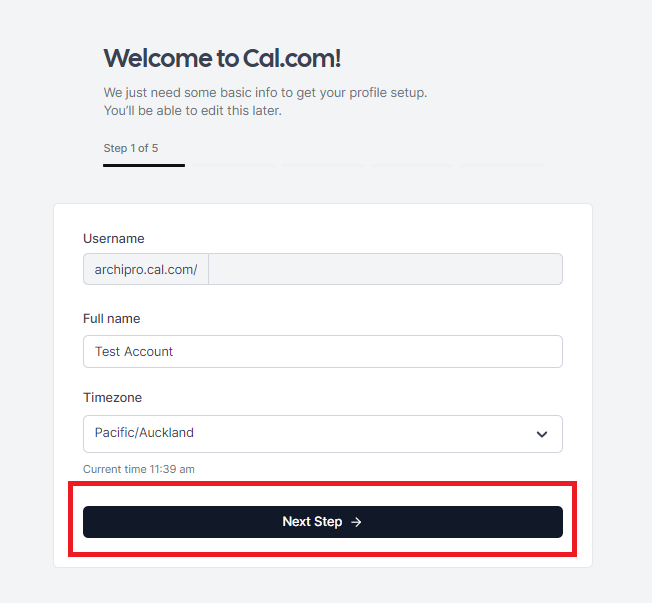
Account Signup
- Put in your name (this will be displayed on your booking calendar).
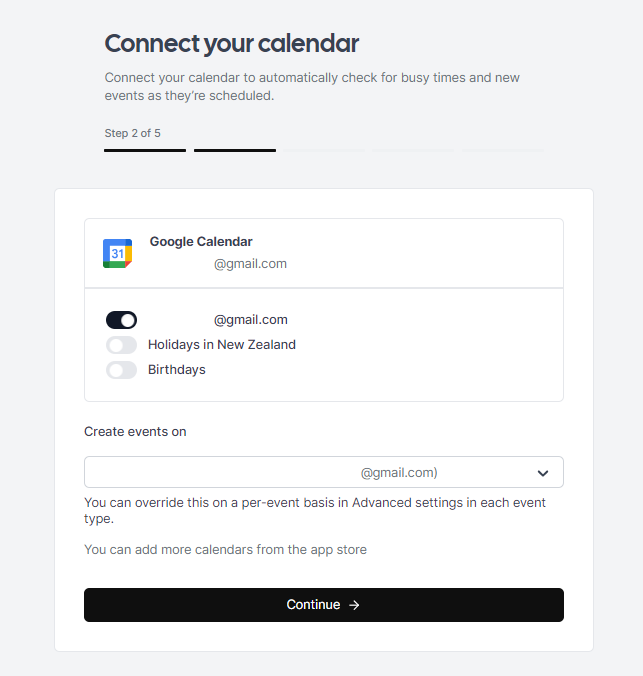
- Next choose which calendar you would like to sync that bookings to be made into.
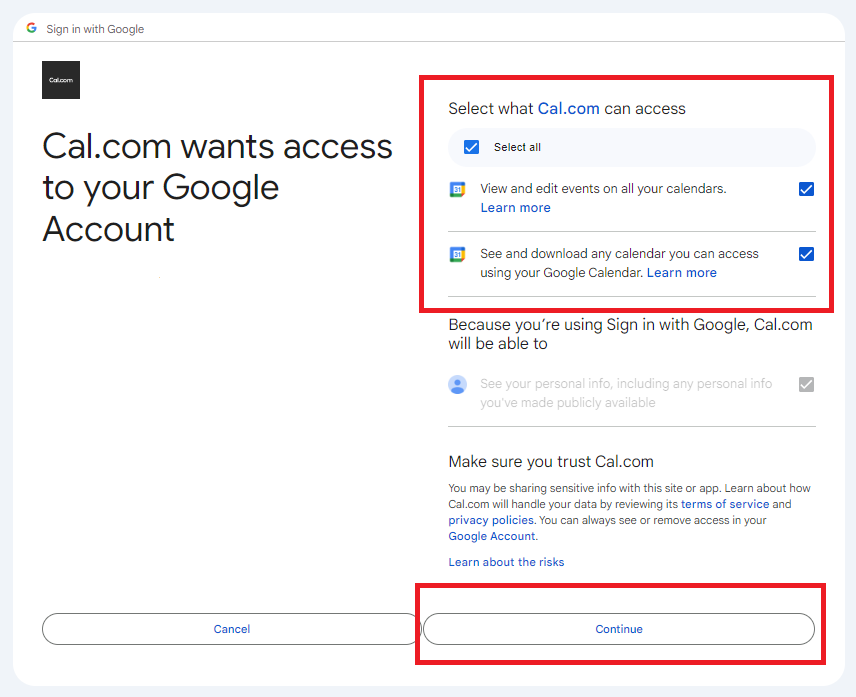
- The next two screens will request your permission to sync the account, accept the options with ‘select all’ and continue.
- Next confirm your calendar to create booking events on.
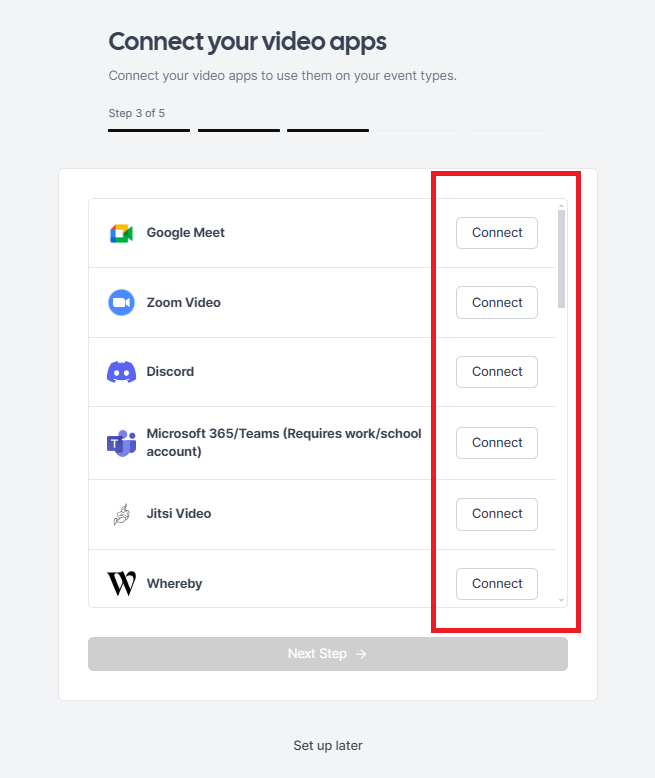
- Next, you have the option to connect a video call app (for example Google Meet or Zoom), in the same way as your calendar above. This will allow you to conduct remote meetings, but is not mandatory. You may choose to skip this.
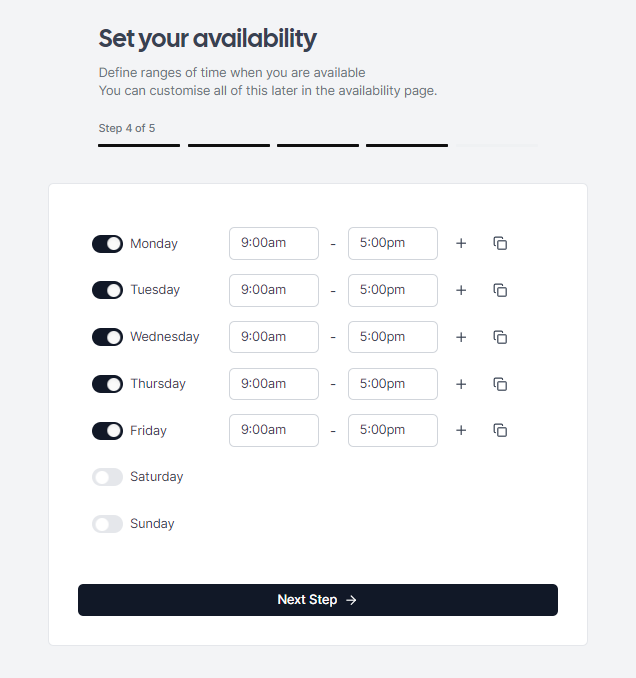
- Lastly, select the days and hours you are available for bookings to be made (you can modify this at any time after the initial account set up).
- Add a profile image and blurb that will be displayed on your booking page if you like, then your account will be created.
Cal.com Setup and options
- Once your account has been created you will be able to access Cal.com admin section, where all the options are available for complete control over your bookings scheduling.
- On the main page you will see on the left hand menu, primary options for ‘Event Types, Bookings, Availability and Teams’.
Event Types
Full guide here
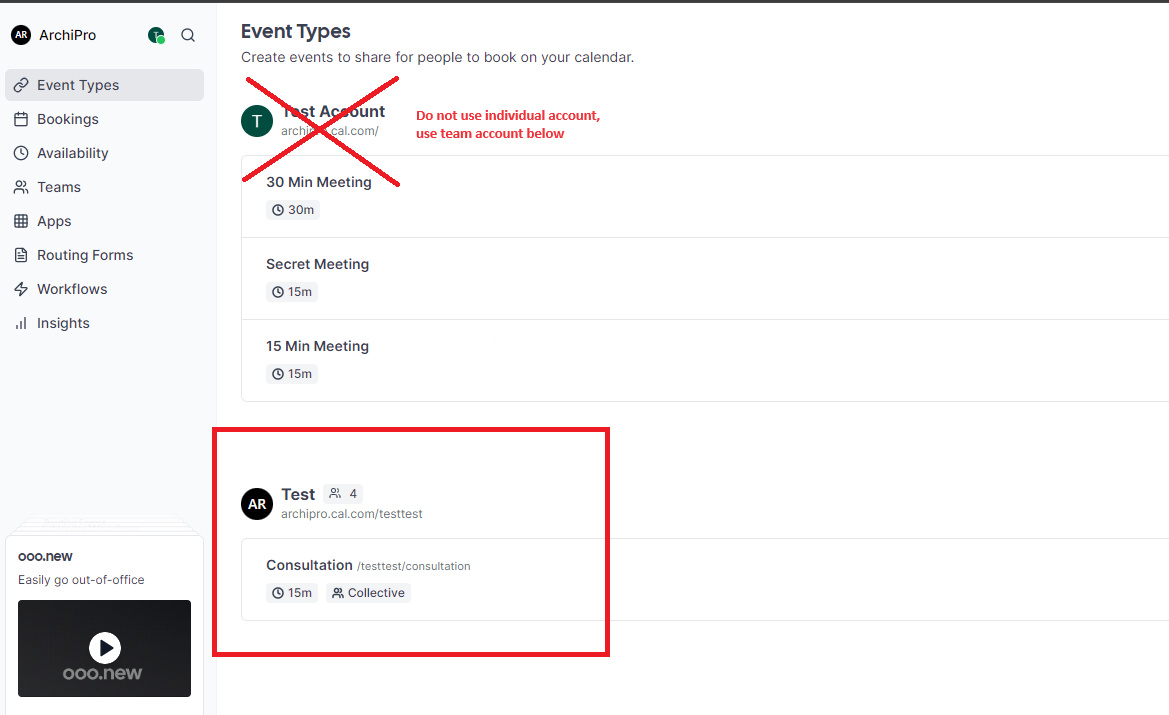
*Important note: Use the team profile - not the personal profile - see Fig.
You will have two profiles that you will be able to create and edit events on, the top will be your personal profile, while the bottom will be your ‘team’ profile.
Though you may use either, the distinction is that the team profile can house multiple members i.e. of your company, who can be selected by the person booking the meeting. Use this profile to add additional team members. More on this below.
Event Setup:
- This is where you will set the type of meeting you will provide, including name, length of time (e.g. 30 mins) and minimum notice period including buffer time around meetings.
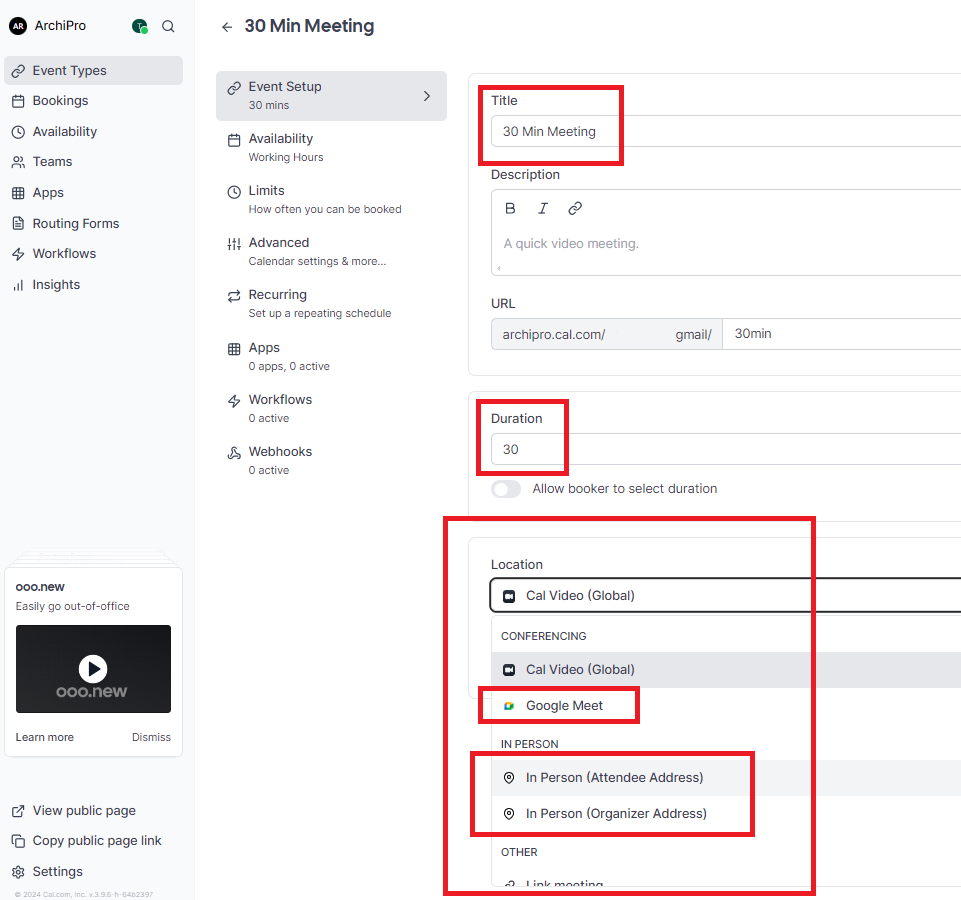
- Under the team profile, you will see the name of all the event types you have created. Click on one to edit or click ‘new’ in the top right corner to create a new event type.
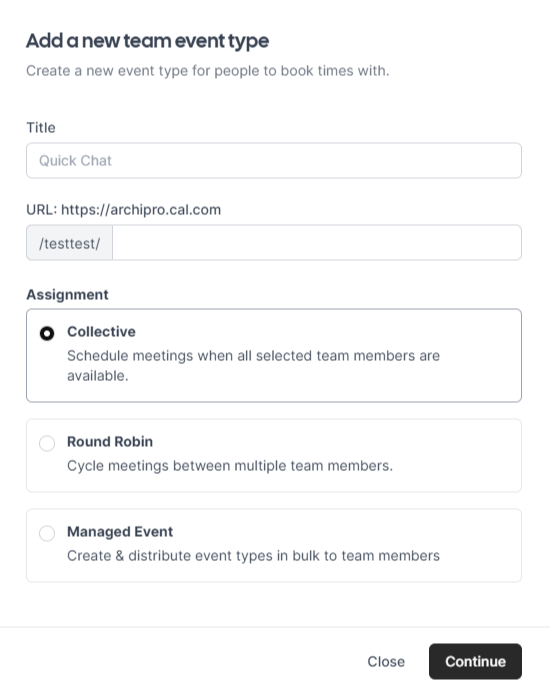
- Start by choosing a name for the event type e.g. ‘30-min Consultation’
- Next choose a booking URL name - hint - just call it the same as the name.
- Next choose whether the booking is any of the following;
- Collective - All members will have to be available at the same time.
- Round robin - Any members you have added to the team can be booked, but assigned new meetings in a round robin format.
- Next choose the duration of the meeting in minutes or hours.
- Then choose the location of the meeting, either physical address or virtual with the video conferencing app you connected in the account setup process.
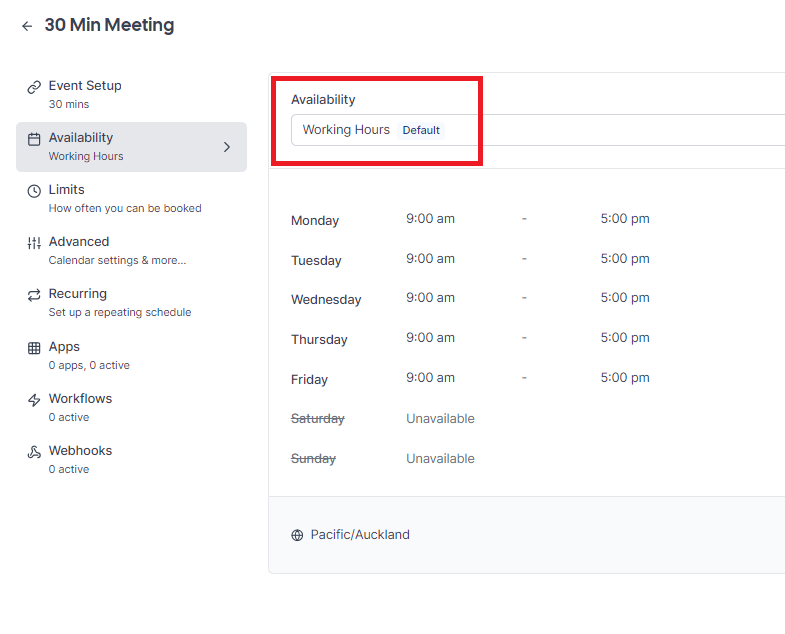
Availability:
- Select availability from the left hand menu, and choose your availability profile to use with this event type. You can use the original one you created in the setup process, or modify and create a new one now.
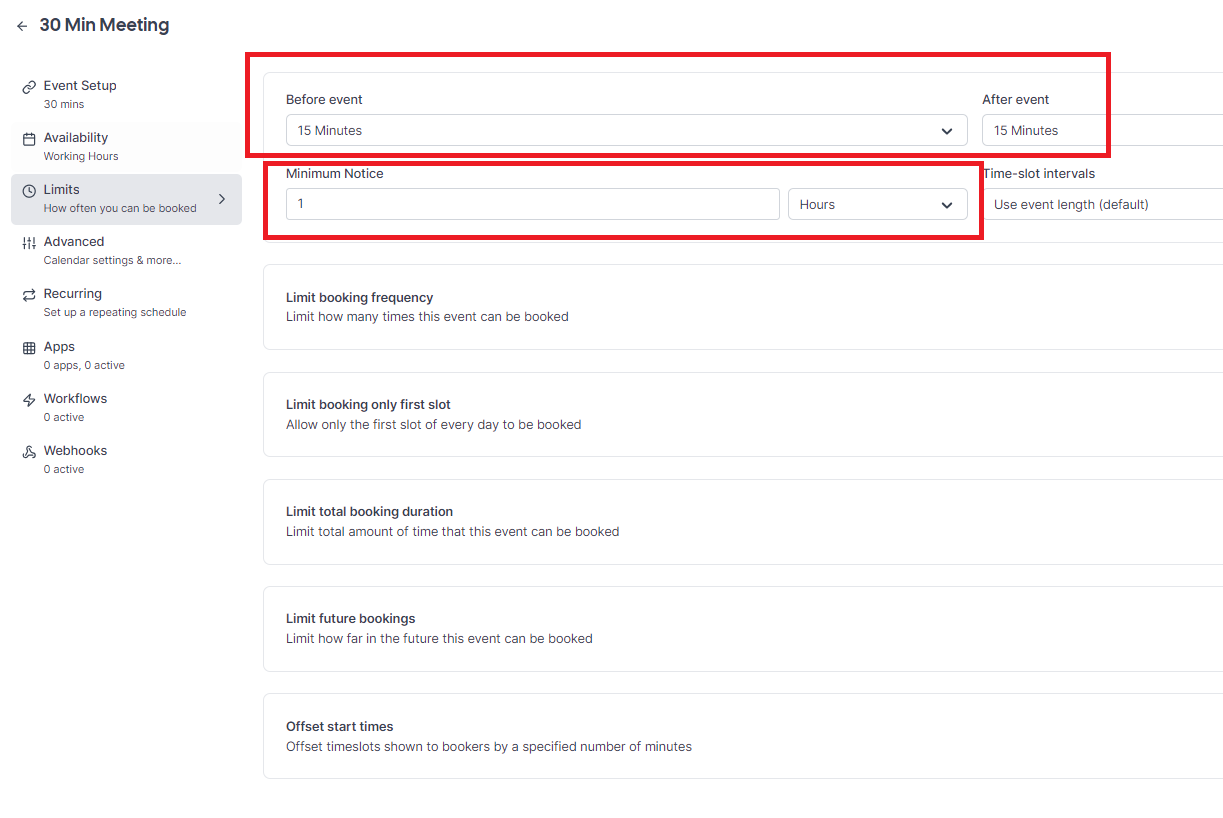
Limits:
- In this section on the left hand menu, you may choose to limit the client booking meetings too close together or with too shorter notice period. Choose a buffer time before and after each meeting slot as well as the notice time required to book a meeting e.g. 1 day. This will apply these limits to the booking calendar and what is available for the client to select.
BASIC SETUP COMPLETE
Feature Activation in ArchiPro
Activation
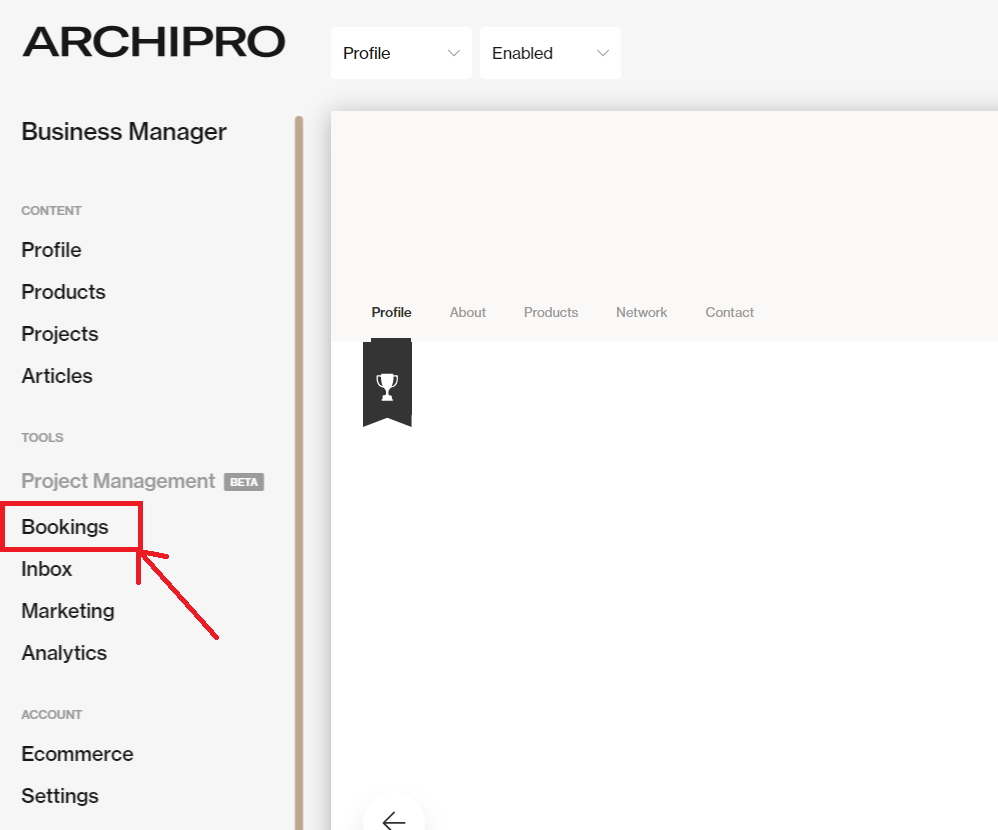
- We will activate the feature inside your ArchiPro Business Manager. It can be found in the left hand menu under the ‘Tools’ section - see image.
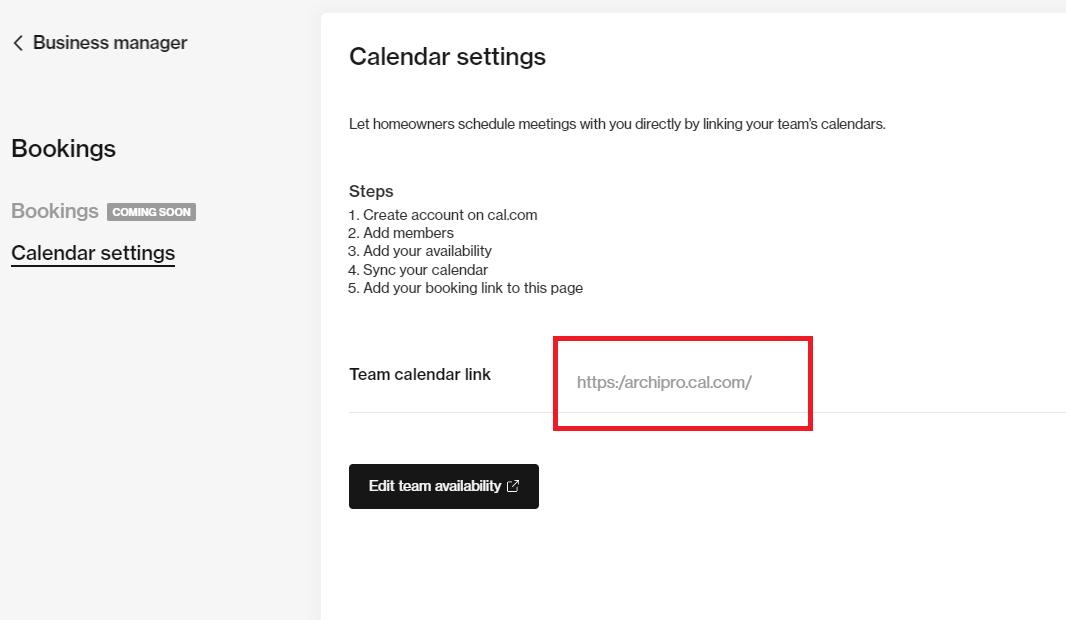
- Click this and move to the calendar settings page.
- Here you need to add the unique link found in your Cal.com account team you have just set up.
- Go to Cal.com account.
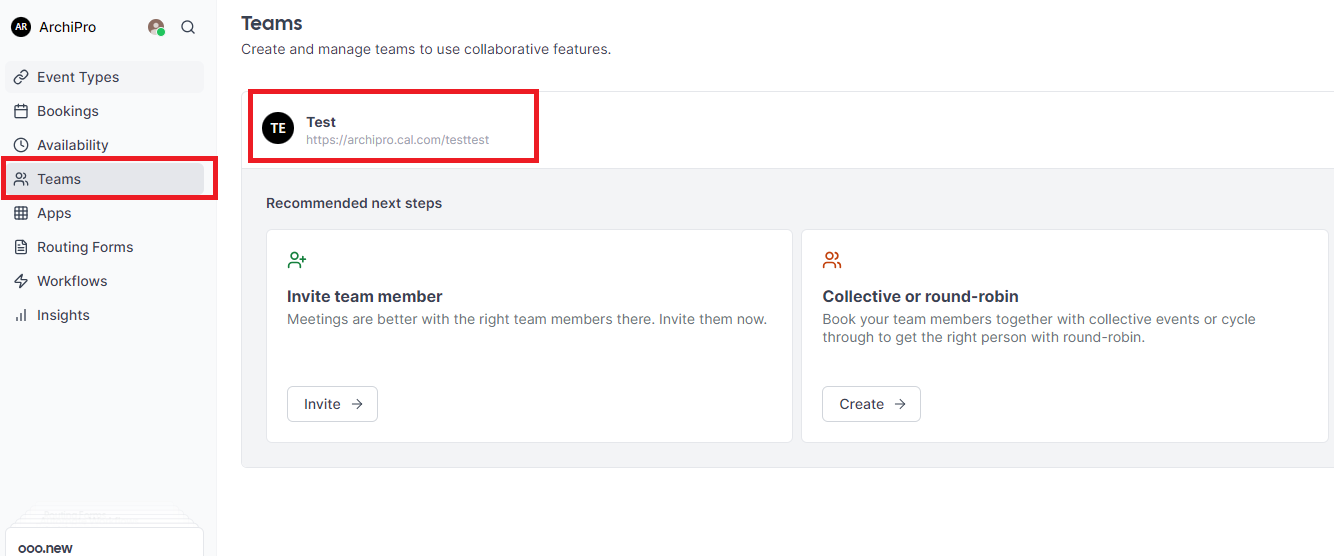
- Click the ‘Teams’ tab on the left hand menu.
- Click the team name to view its profile.
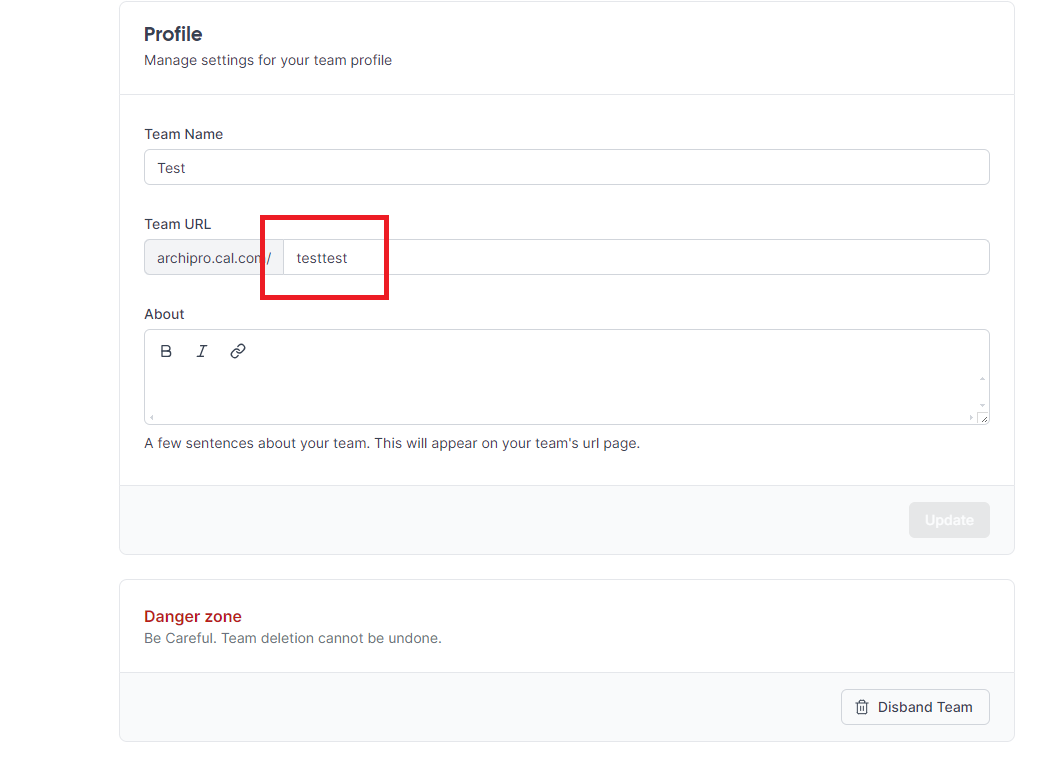
- In the profile section you will see the unique link for your team.
- Copy this.
- Now paste this into the ‘Team calendar link’ on the ArchiPro business manager page.
- Return to the ArchiPro Business Manager main page and click ‘save and close’.
Client Booking Experience
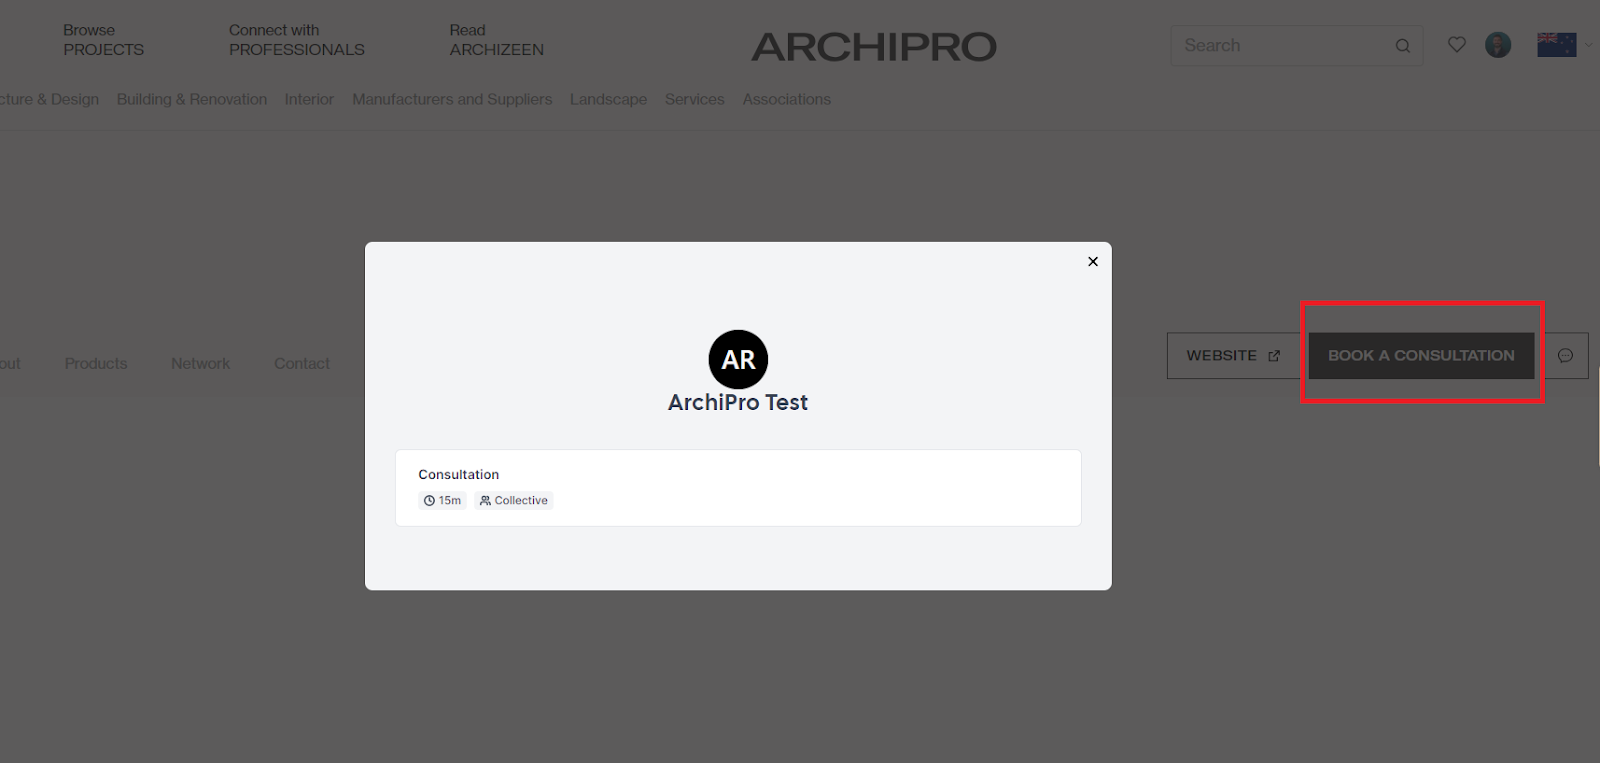
- On your ArchiPro company page, clients will see the button to ‘Book a consultation’.
- Once clicked the ‘Event Types’ you set up in the Cal.com account process will display for selection.
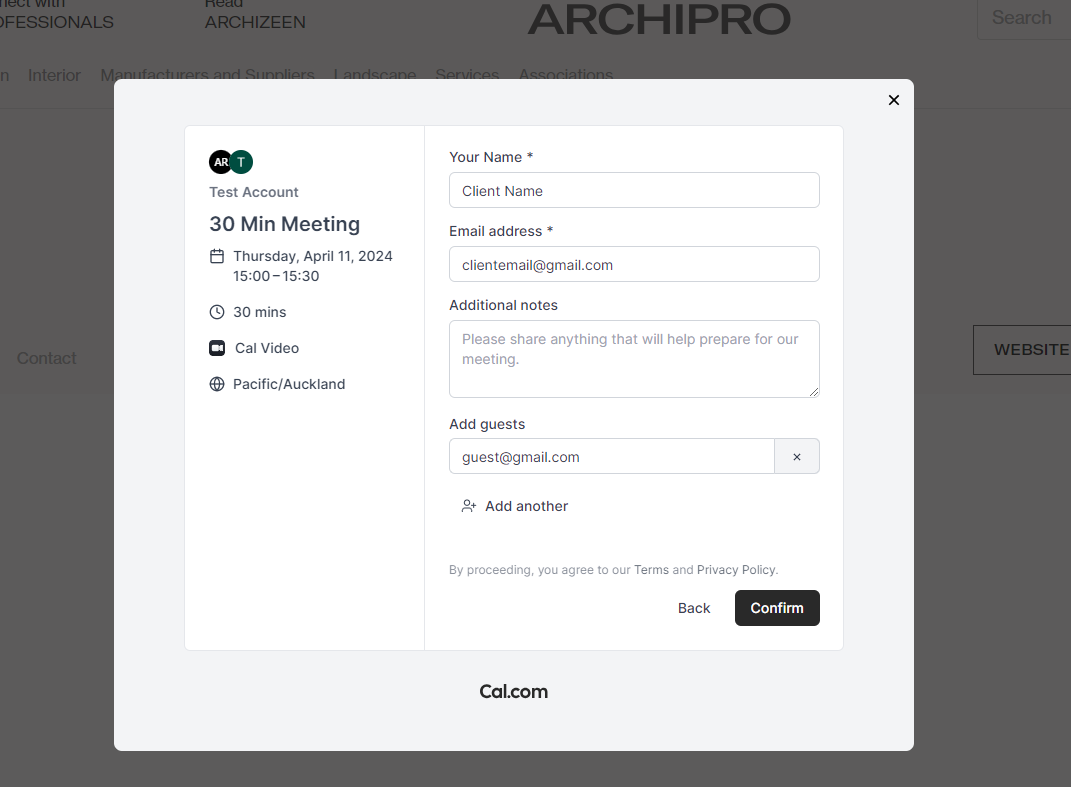
- After this selection the calendar for that event type will display for the client where they can select their preferred time based on the availability you set and members available.
- The client will then fill out their details and choose to add any guests.
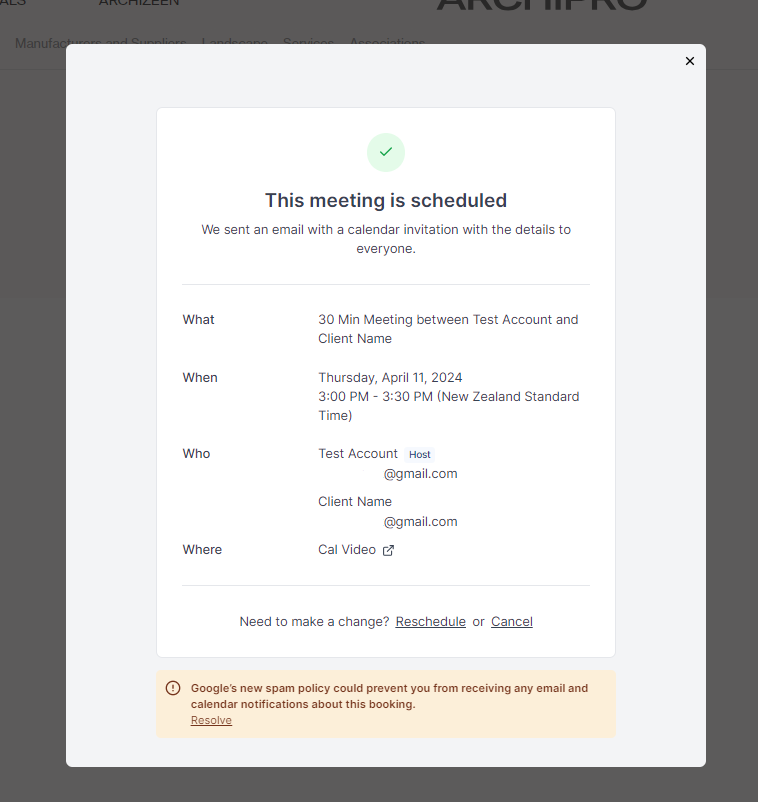
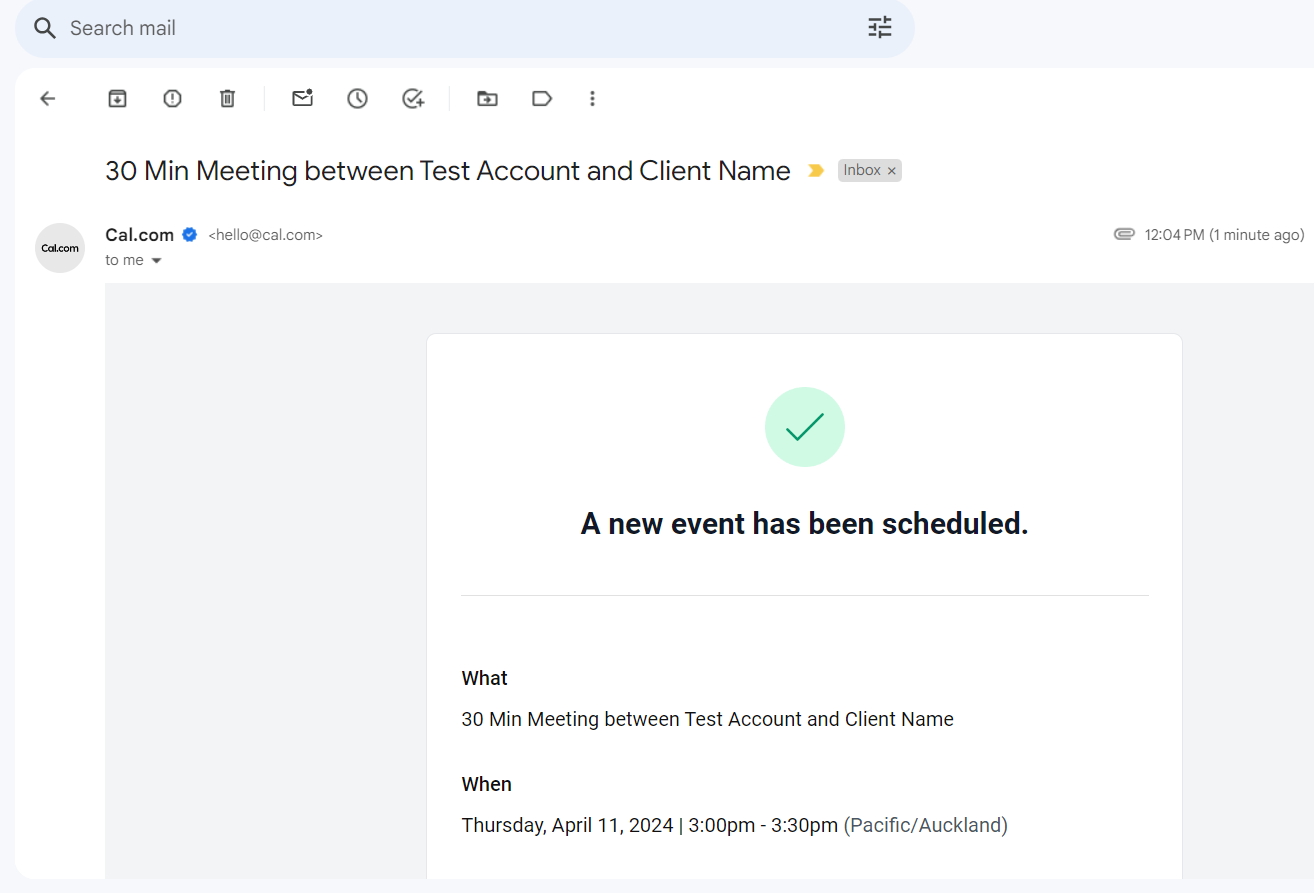
- Once confirmed you and the client will receive a confirmation email.
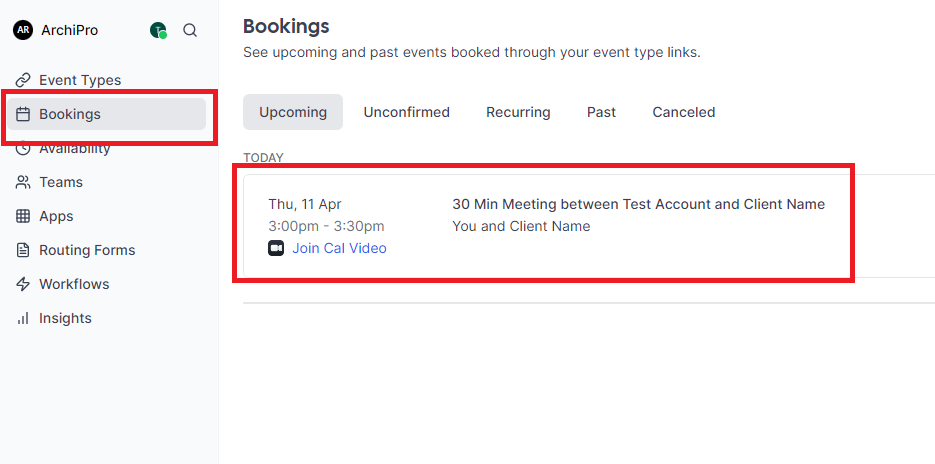
- To view all your bookings (and to cancel any), login to the Cal.com account and select ‘Bookings’ from the left hand menu. This will be one of the features that will be integrated into the ArchiPro business manager when this feature goes to full launch.