Find out how to install ArchiPro Pixel on your website.
What is ArchiPro Pixel?
A new way to visualise the visitor behaviour between your ArchiPro profile and your website. We use an ArchiPro Pixel code that is installed on your website to make this connection. Consider it like digital footprints of a user's website behaviour between both websites. Learn more here.
Where to find the ArchiPro Pixel code
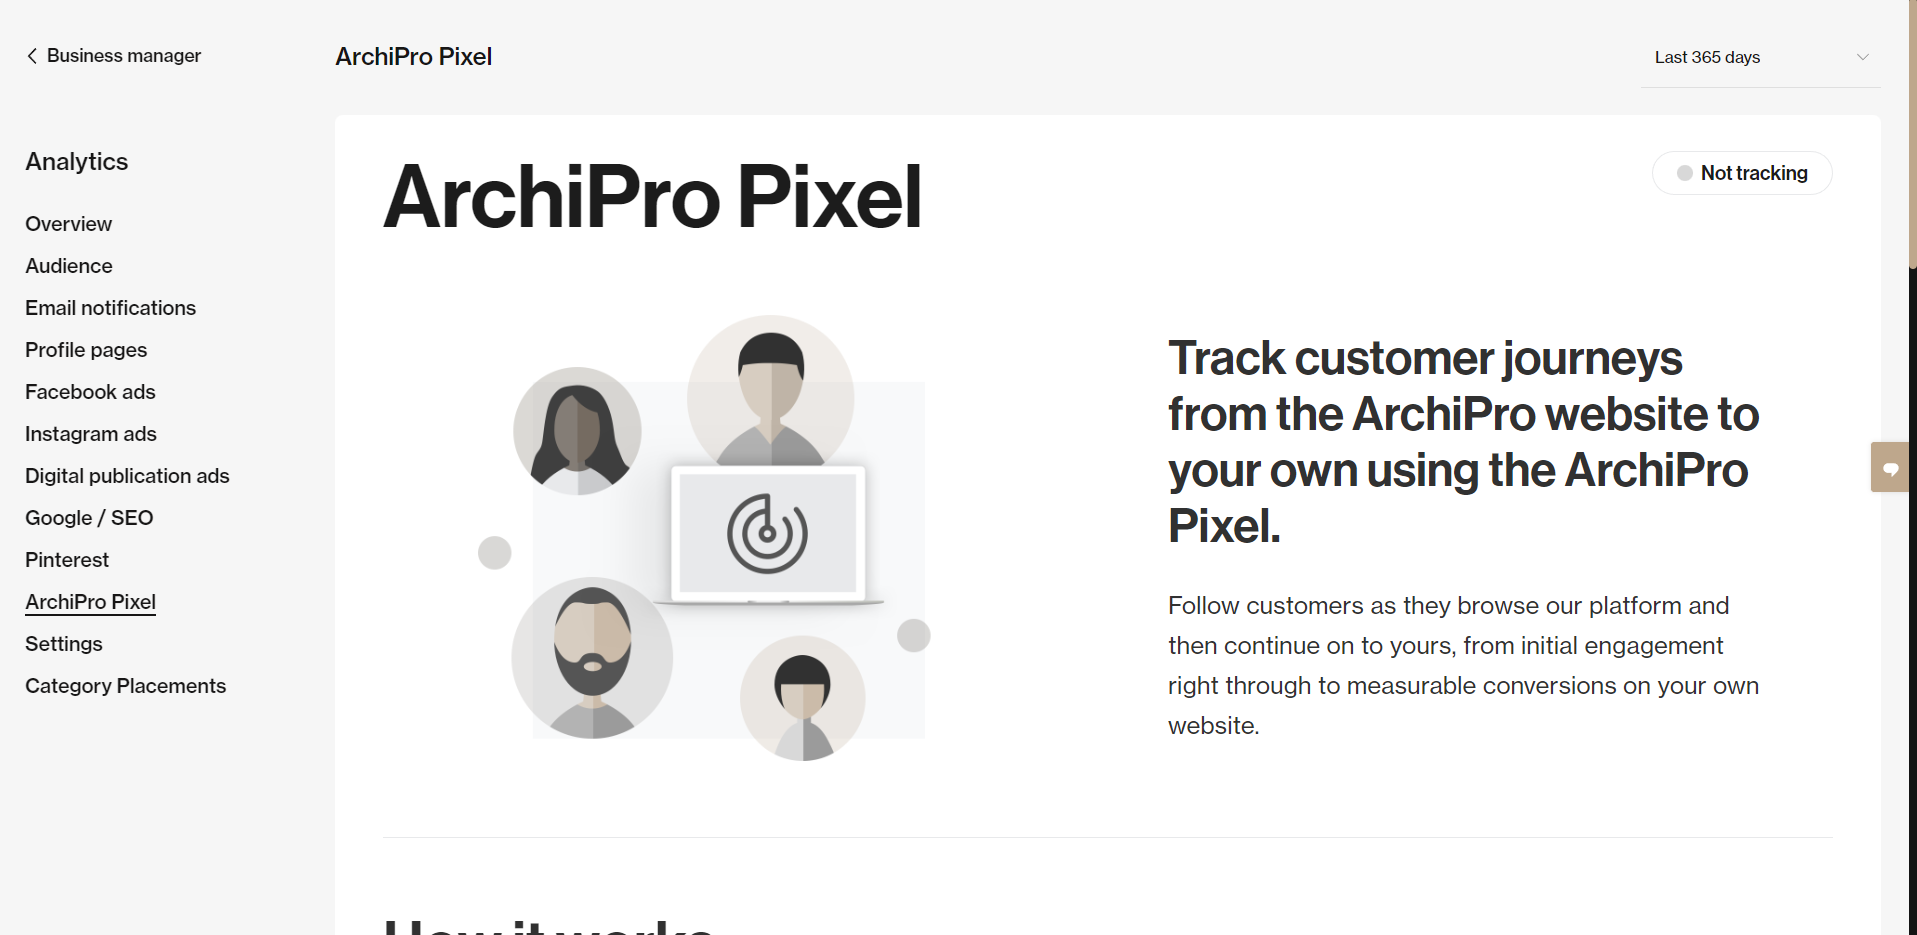
Within Business Manager, head to the Tools > Analytics tab, then click ArchiPro Pixel.

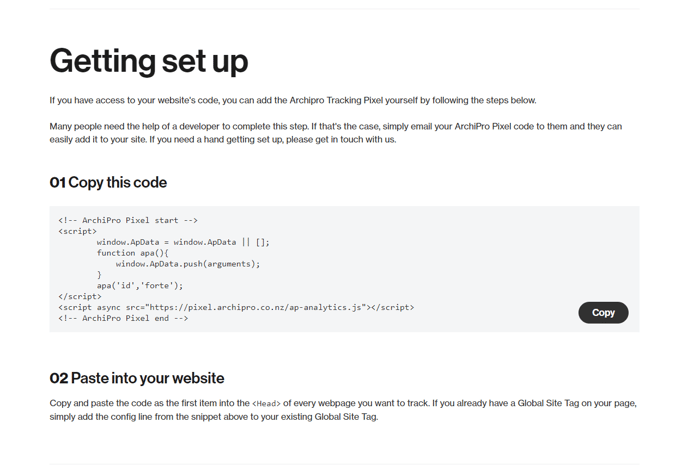
Scroll down this page and find the Copy this code section. Highlight and copy the code to install ArchiPro Pixel by using one of the following methods below. The ArchiPro Pixel installation should take a maximum of 10-15 minutes.

Ways to install ArchiPro Pixel
Please get in touch with your Client Director if you're not using one of the following platforms for your website.
Jump to your platform:
Google Tag Manager
If you already have Google Tag Manager installed and are using this to manage other tags such as Google Analytics, Facebook, and Hotjar, then the process is the same.
See Google Tag Manager instructions.
- Go to https://tagmanager.google.com.
- Sign in to your Google Account. Learn how to create a Google Account.
- On the Tag Manager container you want to edit.
- In the Workspace tab, click Tags (on the left).
- In the Tags section, click New (top right).
- In the panel, follow these steps:
- Replace Untitled Tag with the name of your tag (for example, 'Google Analytics 4').
- In Tag Configuration, choose the tag you want to create. Learn more about tags.
- In Triggering, choose when a specific tag should fire. Learn more about each trigger type.
- Click Save.
Next steps
Make sure the tags you've added to your website behave as intended. Then, publish the changes you've made to your website.
Verify tags
- Go to https://tagmanager.google.com.
- Sign in to your Google Account. Learn how to create a Google Account.
- On the Tag Manager container you want to edit.
- In the Workspace tab, click Preview (top right) to launch Google Tag Assistant in a new tab.
- Enter your website URL and click Connect. Learn to debug with Tag Assistant.
Publish tags
- In the Workspace tab, click Submit (top right)
- In the Submission Configuration section, follow these steps:
- Select Publish and Create Version to publish the changes to your site. To save the changes without publishing them, select Create Version instead.
- Enter a name and description for the version.
- Select Activity History to review the changes you've made since the previous version.
- Click Publish (top right).
Wordpress / WooCommerce
The header code injection is a direct way to install the ArchiPro Pixel code to your WordPress or WooCommerce site.
If you are unsure how to do this, it may be best to consult with your website team/developer about installing the ArchiPro Pixel code. Or alternatively, ask your Client Manager to help if you're stuck.
It will take a quick 15 minutes for your web team to insert the header code.
See instructions from WordPress:
How to Add Code to WordPress Header and Footer With a Plugin
How to Manually Add Code to WordPress Header and Footer
Squarespace
Code injection is a direct way to install the ArchiPro Pixel code to your Squarespace site.
If you are unsure how to do this, it may be best to consult with your website team/developer about installing the ArchiPro Pixel code. Or alternatively, ask your Client Manager to help if you're stuck.
It will take a quick 15 minutes for your web team to insert the header code.
See instructions from Squarespace:
Using Code Injection on Squarespace
Wix
Directly embed your ArchiPro Pixel code on your Wix site.
See instructions from Wix:
Embedding Custom Code on Your Site
- Go to Settings in your site's dashboard.
- Click the Custom Code tab in the Advanced section.
- Click + Add Custom Code at the top right.
- Paste the code snippet in the text box.
- Enter a name for your code.
Tip: Give it a name that is easy to recognize so you can quickly identify it later. - Select an option under Add Code to Pages:
- All pages: This adds the code to all of your site's pages, including any new pages that you create in the future. Choose whether to load the code only once per visit, or on each page your visitor opens.
- Choose specific pages: Use the drop-down menu to select the relevant pages.
- Choose where to place your code under Place Code in:.
- Head
- Body - start
- Body - end
- Click Apply.
Shopify
The method of installing ArchiPro Pixel on a Shopify website is similar to the Header code injection method. Follow the steps below and watch the video to learn how.
- Navigate to the Themes section in the Online Store menu in your Shopify Store.
- Click on Edit HTML/CSS or Edit Code in the Actions drop-down menu of the Current Theme section.
- Click on “theme.liquid” in the Layout section.
- Paste the ArchiPro Pixel code just before the </head> tag and Sav
RocketSpark
This support guide will show you how to add tracking or third-party scripts to your Rocketspark website, including options like Adwords Tracking, Facebook Audience Tracking, Facebook Pixel, and more.
Please click this link to be redirected to the Rocketspark article about installing Pixel Tracker.
How do I know if ArchiPro Pixel is installed correctly?
You can find your 'tracking status' on the top right of your ArchiPro Pixel installation page, as shown in the image below. If the status is green with the title Tracking, the code is installed, if the status is grey with the title Not tracking, it has not been installed. It may take some time for the status to turn green after installing the code.
Not Tracking:

Tracking:
If you need additional help, take a look at our article, Support for ArchiPro Clients: Your Guide to Getting Help, to explore the best next steps.
Last Edited 04/02/25
